Image Installation and Backup
OriginBot does not have a factory installed system, you can use one of the following two ways to install it:
If you want to back up the system image in the current state during use, you can refer to the following instructions to back up the image, after backup, you can still apply the above burning method.
Burn the OriginBot SD card image
Download the OriginBot SD card image
Please download the SD card image of the robot from the table below and extract the downloaded file.
| Version | Release date | Download link | Software version included |
|---|---|---|---|
2024.3.1 |
originbot_sd_image_v2.1.0 |
The new version of the system, all application functions and the source code ros:foxy TogetheROS:2.1.2 |
If you need to download the image of the previous version, you can click here to jump to download
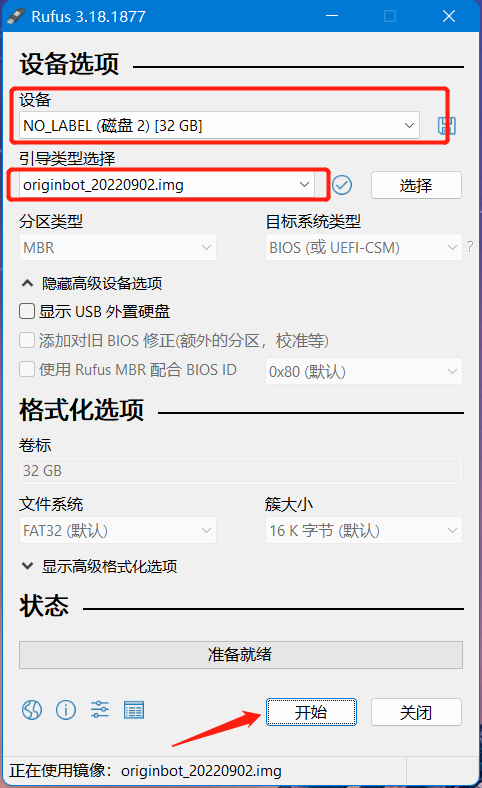
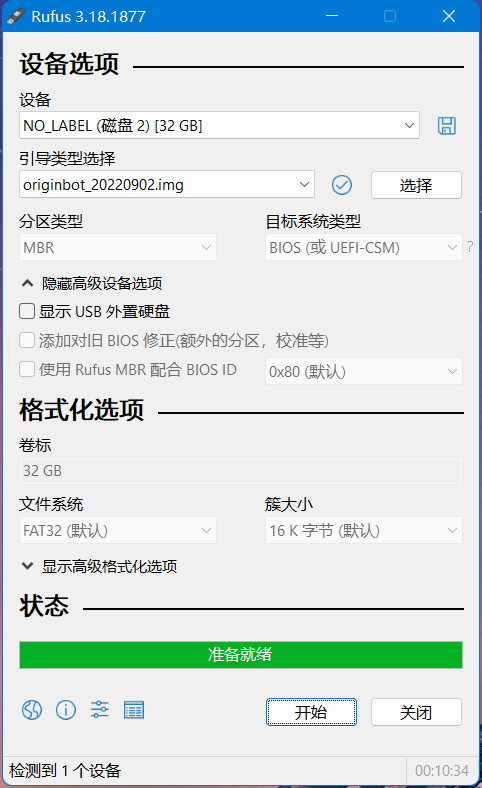
Burn the SD card image
(1) Use a card reader to insert the SD card into the computer, the SD card capacity is recommended ≥ 16GB;
(2)Start the image burning software ( please refer to the common software download);
(3)Confirm the SD card device number and select the system image you want to burn;

Start RDK X3
(1)Confirm that the robot kit has been installed correctly;
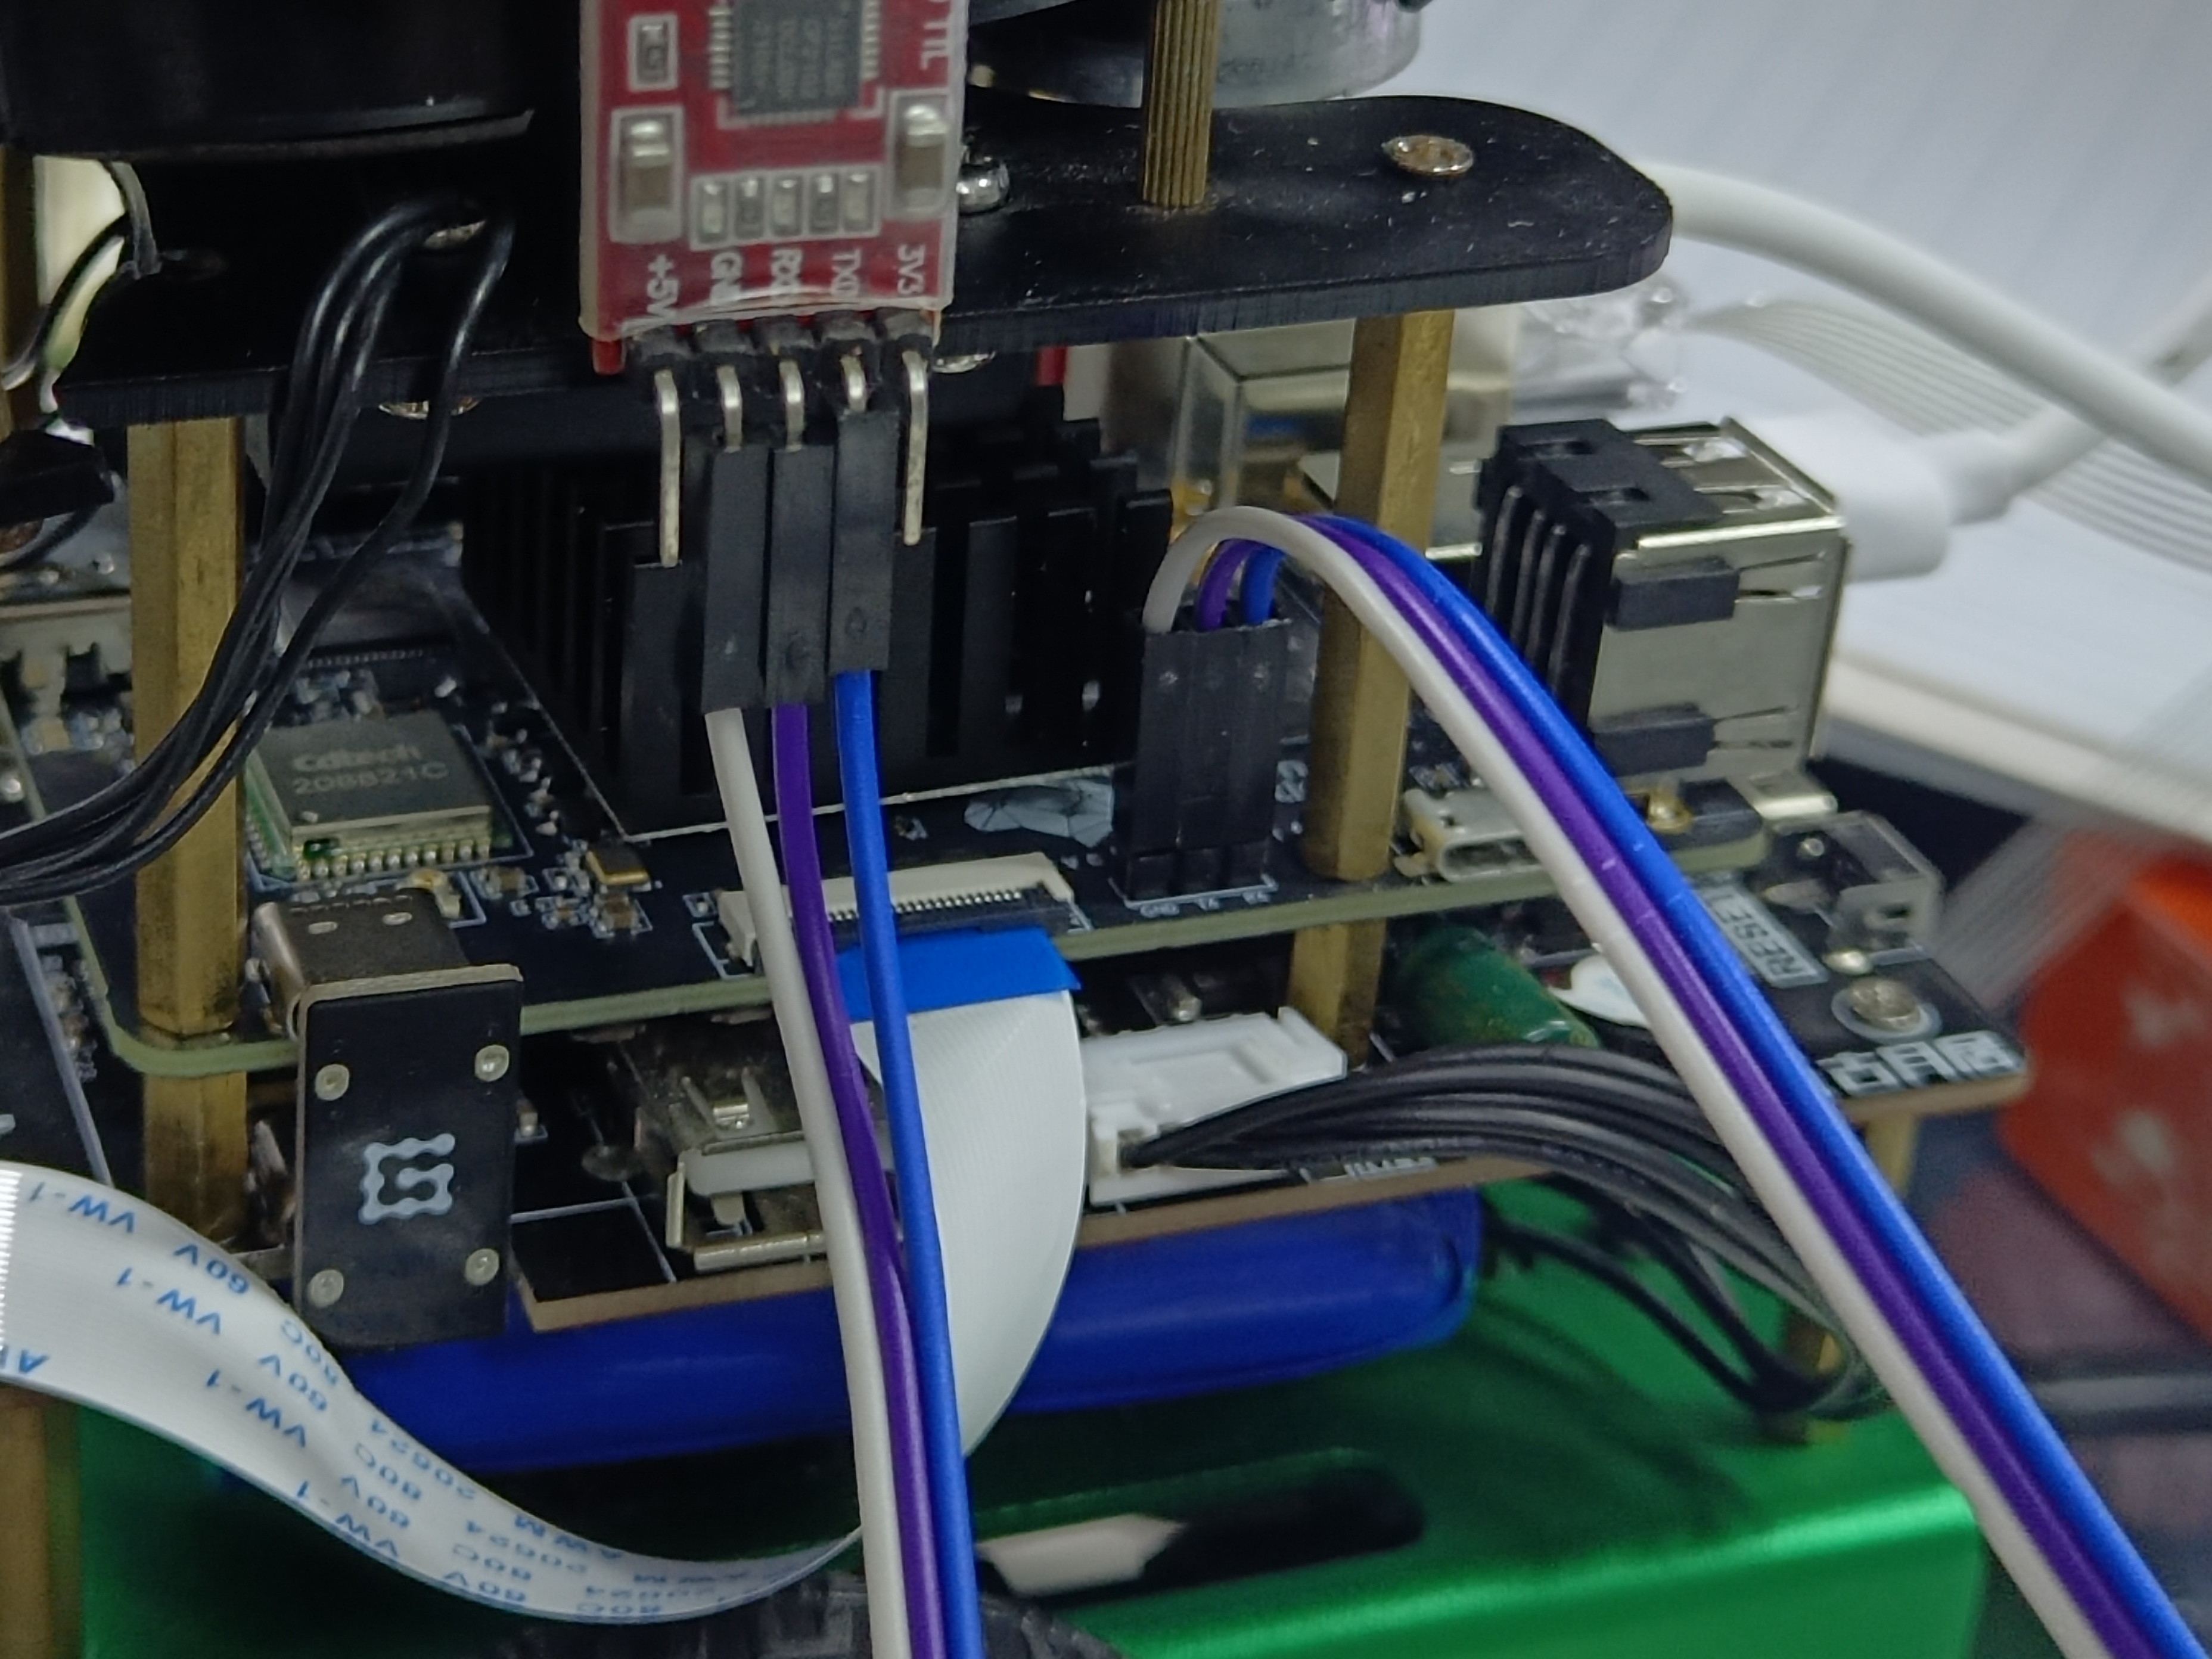
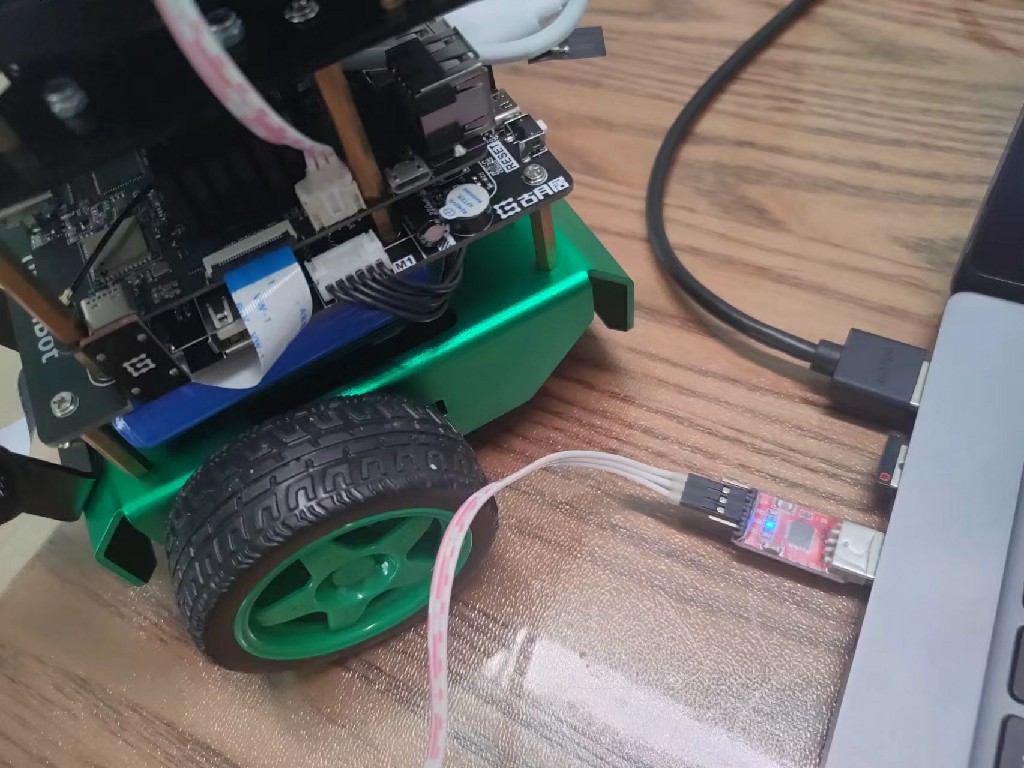
(2)Use the serial port module in the kit to connect the debugging serial port of the RDK X3 on the robot side, and the connection sequence is as follows:
If you connect to Sunrise X3 pi, the interface is slightly different, and the connection sequence is as follows:
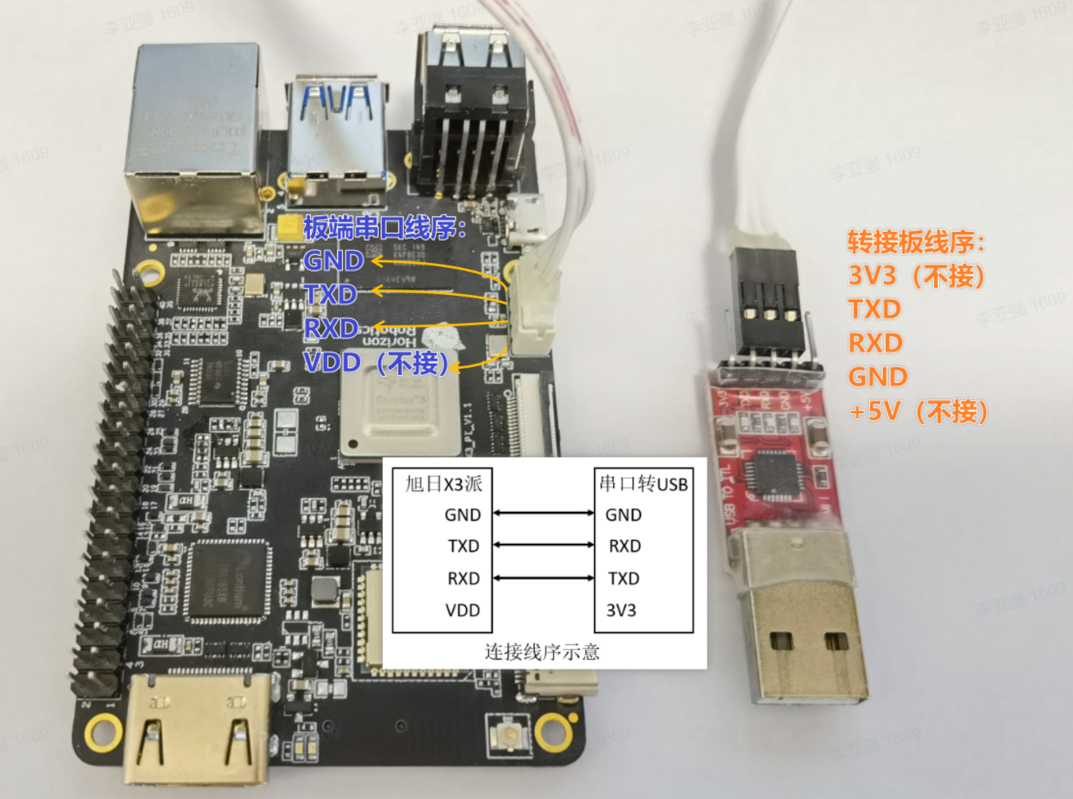
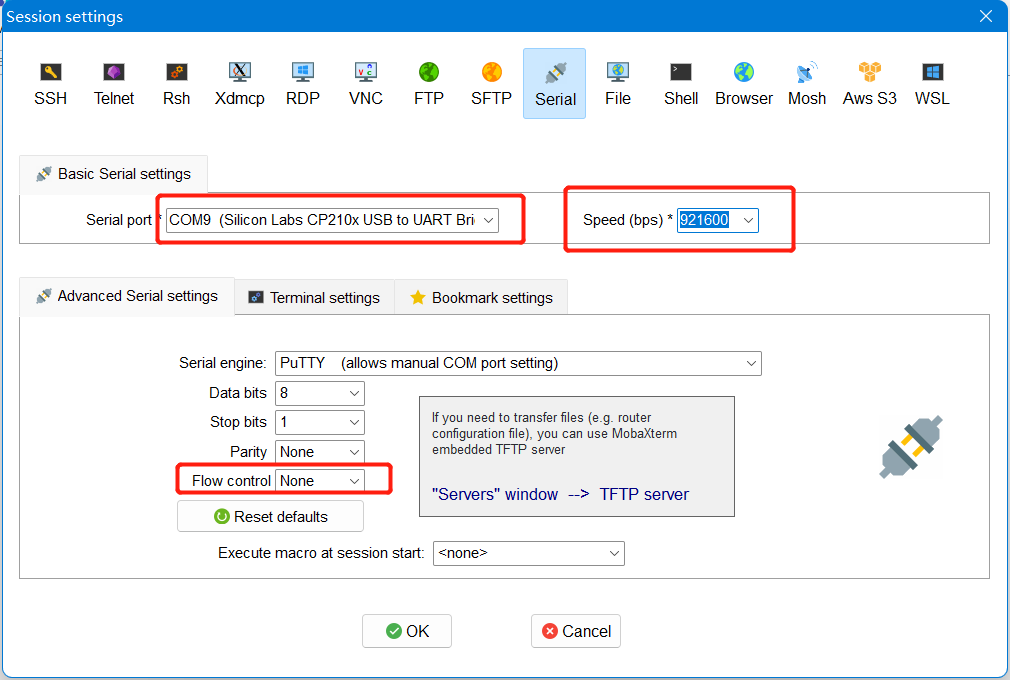
(3)Connect the serial port module to the USB port of the PC, start the serial port software, connect the serial port device, set the baud rate of 921600, and turn off the flow control;
Info
If you can't find the serial port device here, please install the system driver of the serial port module first, and then try again, click here to download the serial port driver, decompress it, and double-click the dpinst64.exe to install it.
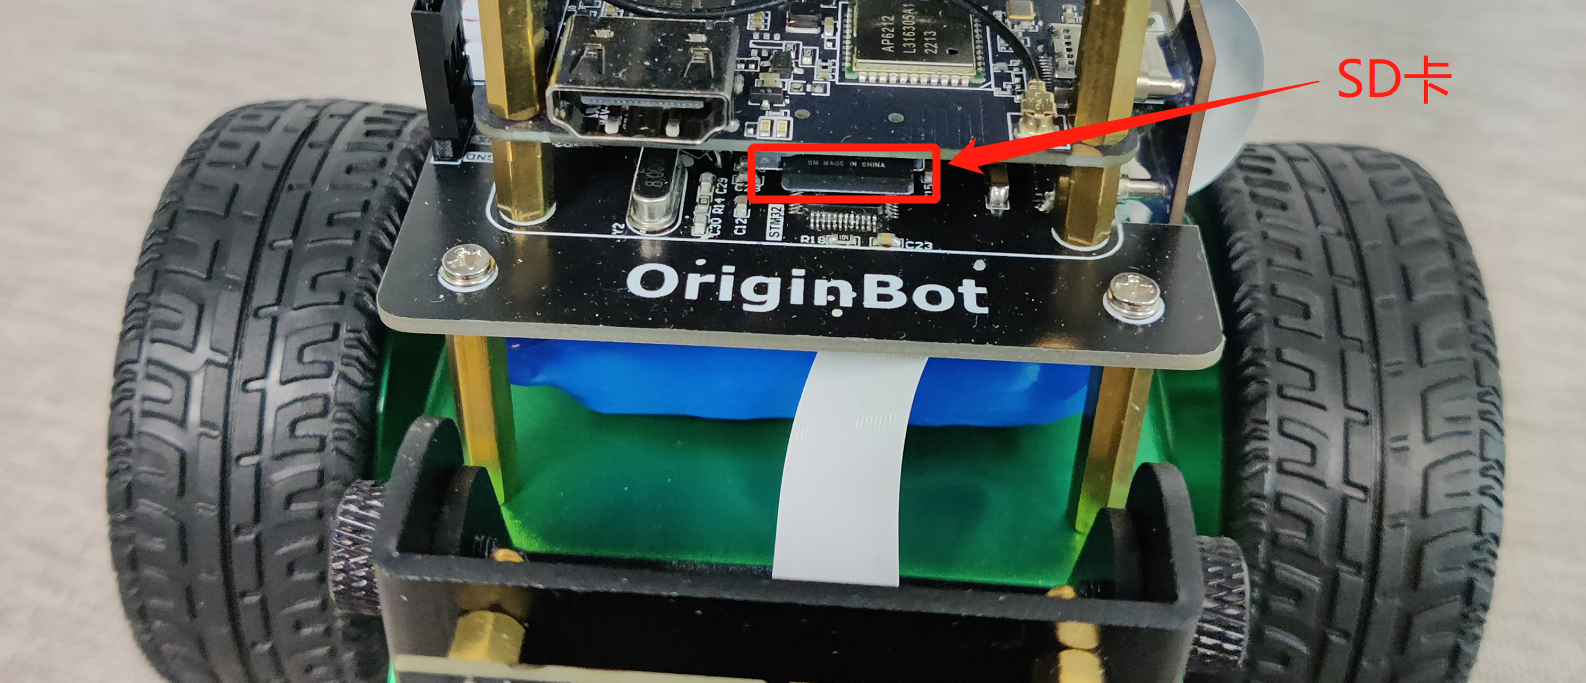
(4)Insert the SD card with the burned image and start the robot power;
(5)You can see the log information output during the boot process in the serial port software, wait for a while, and a login prompt will appear:
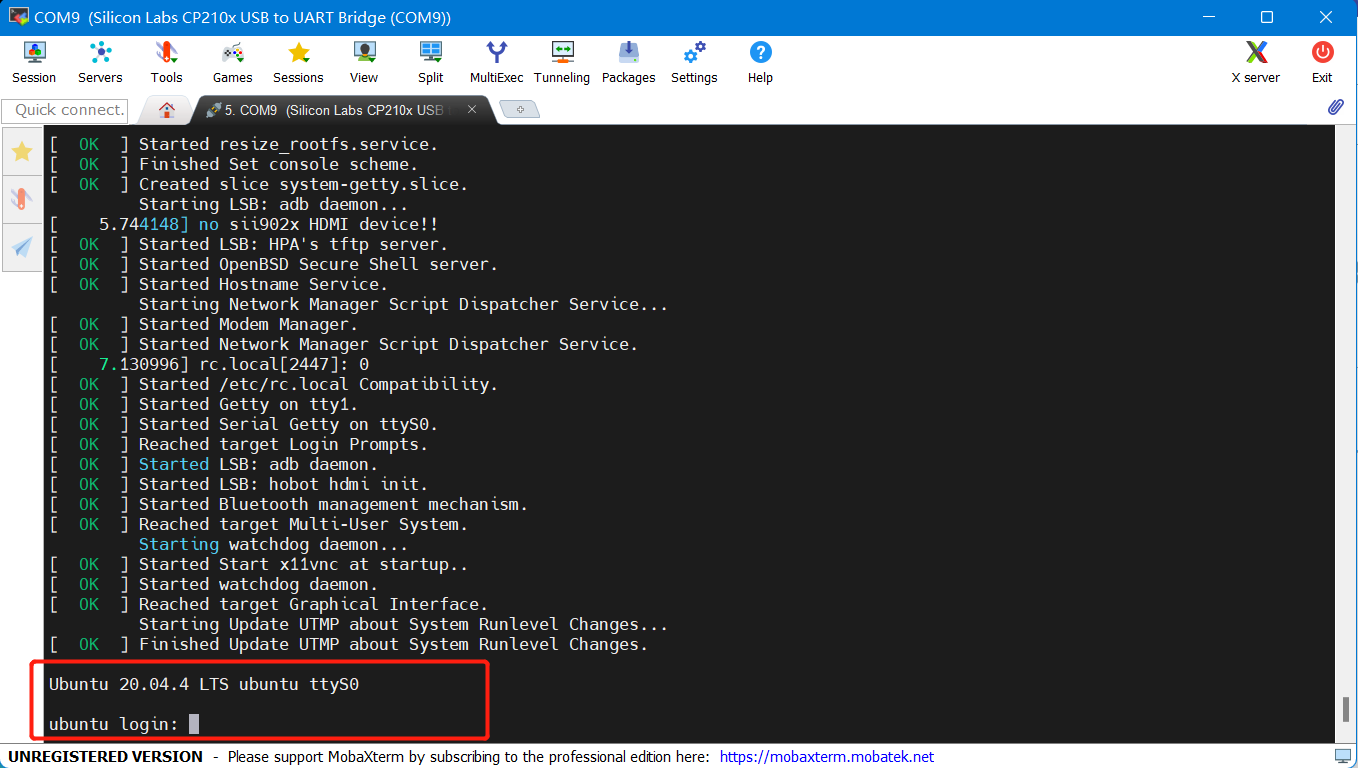
(6)Enter the username and password, both the username and password are root:
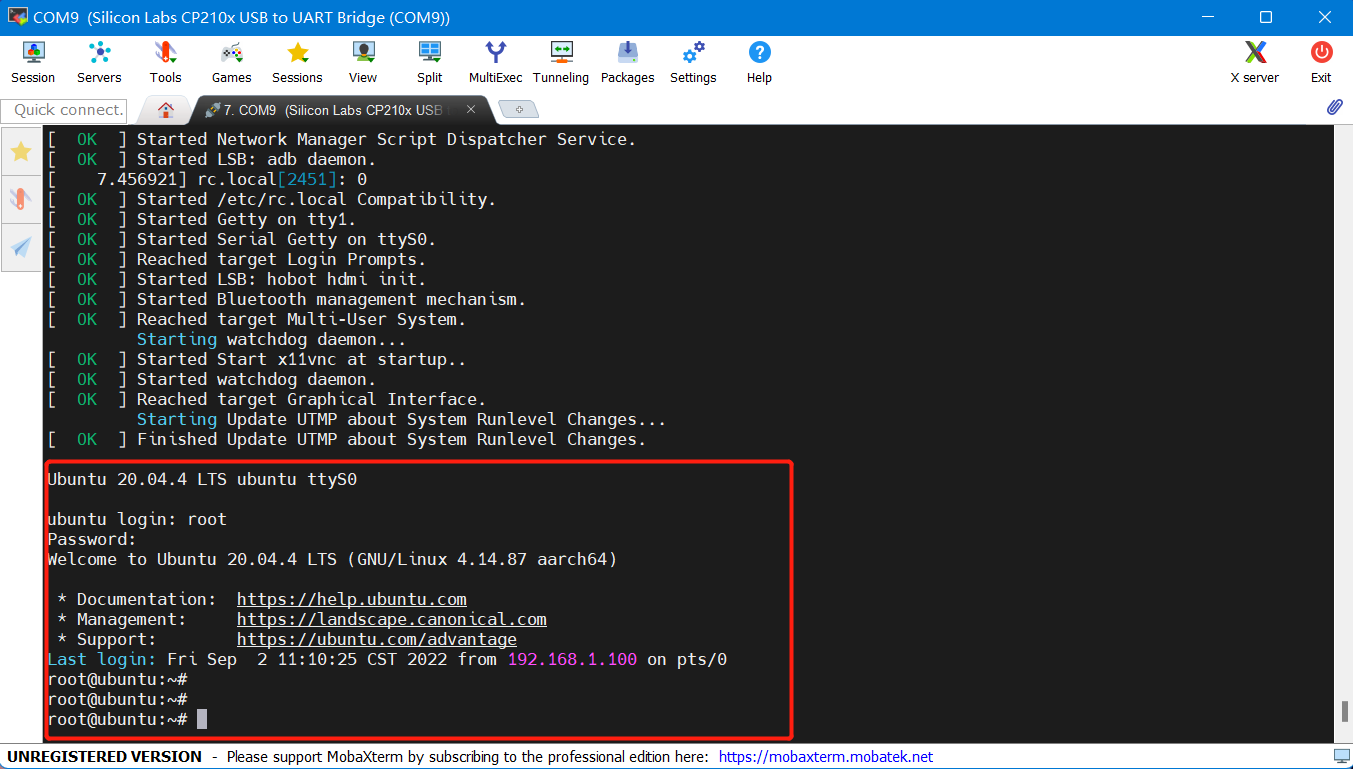
(7)So far, the RDK X3 on the robot side has been successfully started.
Expand SD card space
In order to reduce the size of the system image and facilitate downloading and burning, the free space in the system image has been compressed, and if you need to use the full space of the SD card, you need to manually expand.
After starting RDK X3 and logging in through the serial port, you can use the following command to expand the RDK X3:
#If V1.x is used, run the following command
$ sudo growpart /dev/mmcblk2 1
$ sudo resize2fs /dev/mmcblk2p1

#If V2.x is used, run the following command
$ sudo growpart /dev/mmcblk2 2
$ sudo resize2fs /dev/mmcblk2p2

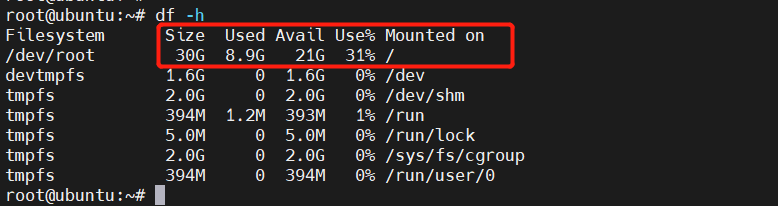
After the operation is successful, restart the system to take effect, use the following command to confirm that the system space expansion is successful, the SD card used here is 32GB:
Configure network connectivity
wireless network
After completing the Ubuntu installation, start the system and follow the following link to complete the configuration of the wireless network:
$ sudo nmcli device wifi rescan        # Scan wifi networks
$ sudo nmcli device wifi list          # List the Wi-Fi networks found
$ sudo wifi_connect "SSID" "PASSWD"    # Connect to a specified wifi network
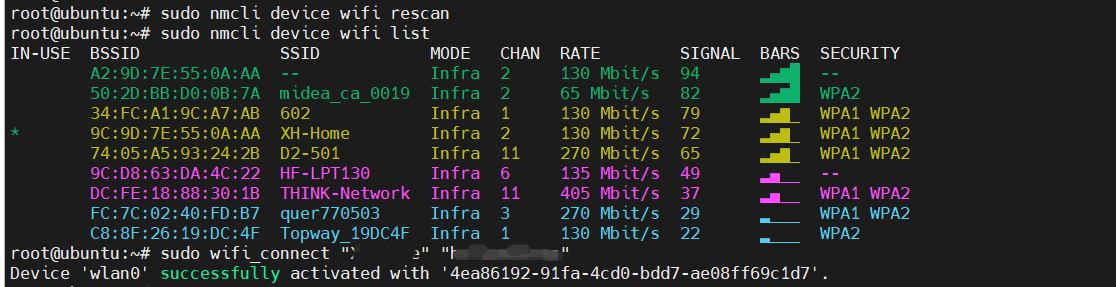
Wait until the terminal returns the message "successfully activated", which means that the WIFI connection is successful. We can Ping a website to check the connection. If you can Ping, it means that the network has been successfully connected, and now you can successfully connect to the Internet, which is convenient for subsequent software downloads and updates.

Wired network
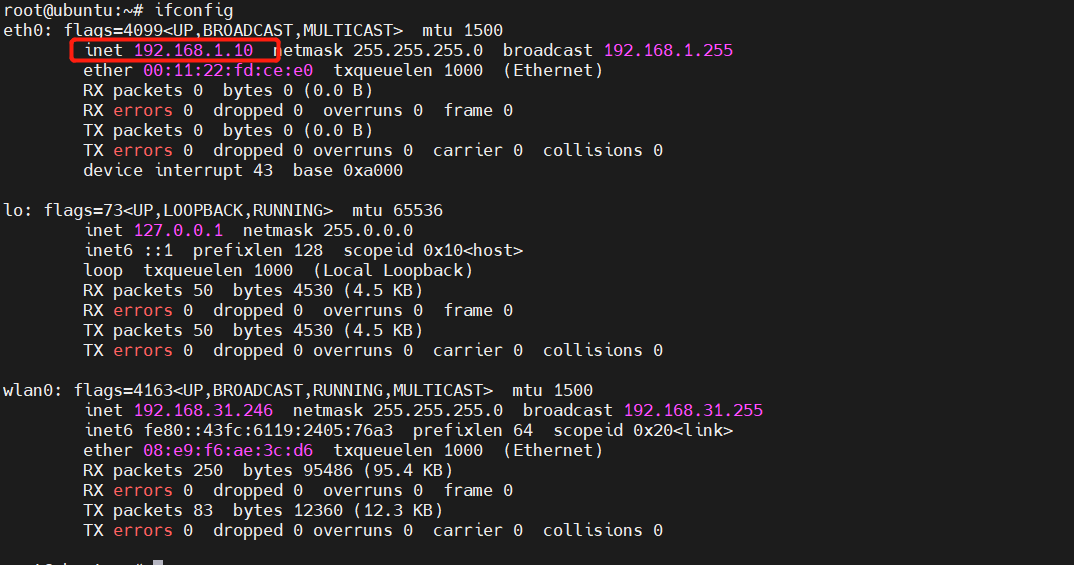
The OriginBot system image has been configured with the static IP of wired network: 192.168.1.10
You can directly connect the network port of RDK X3 and the network port of the PC through the network cable, and you can log in remotely through SSH.
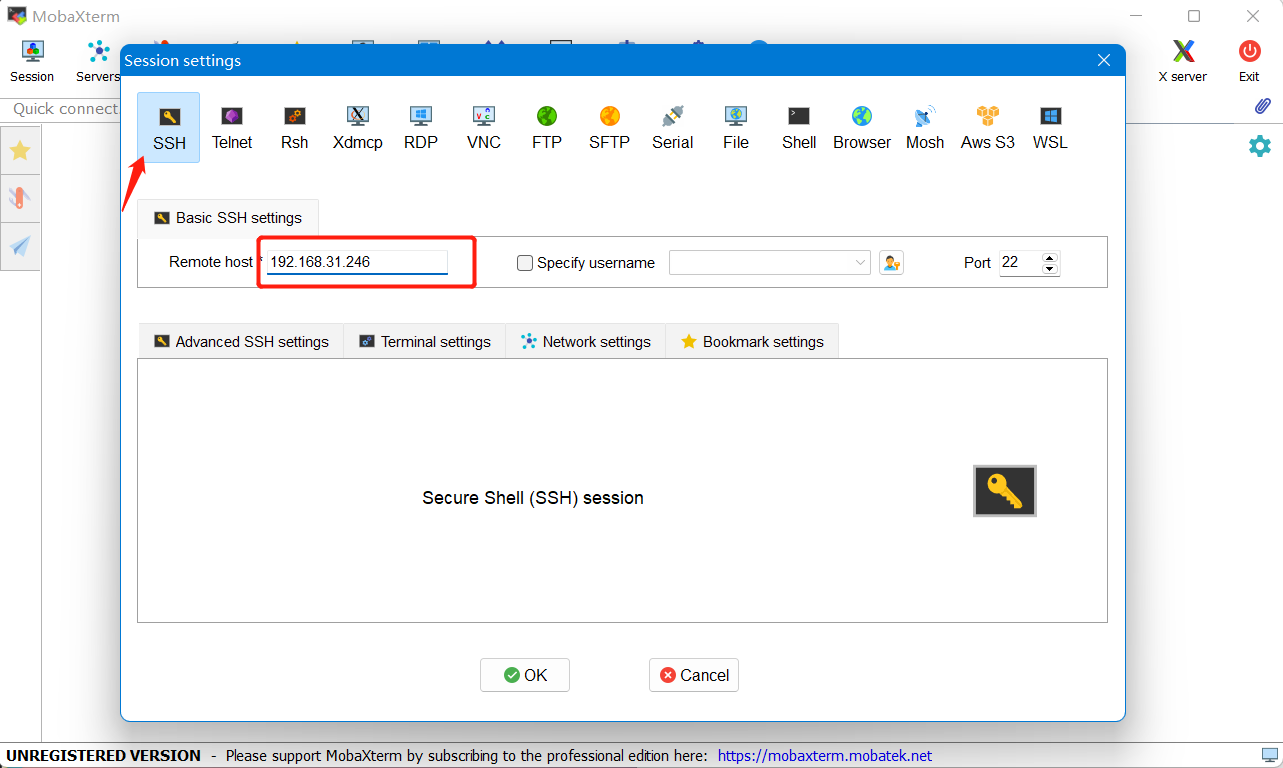
SSH telnet
After the network configuration is completed, you can be free from the constraints of the serial port, and you can remotely log in to the robot through the wireless network (or wired network) for development.
Info
In this section, enter the corresponding IP address depending on whether you are using a wired network or a wireless network. You can run the ifconfig command to query the IP address, eth0 corresponds to a wired NIC, and wlan0 corresponds to a wireless NIC.
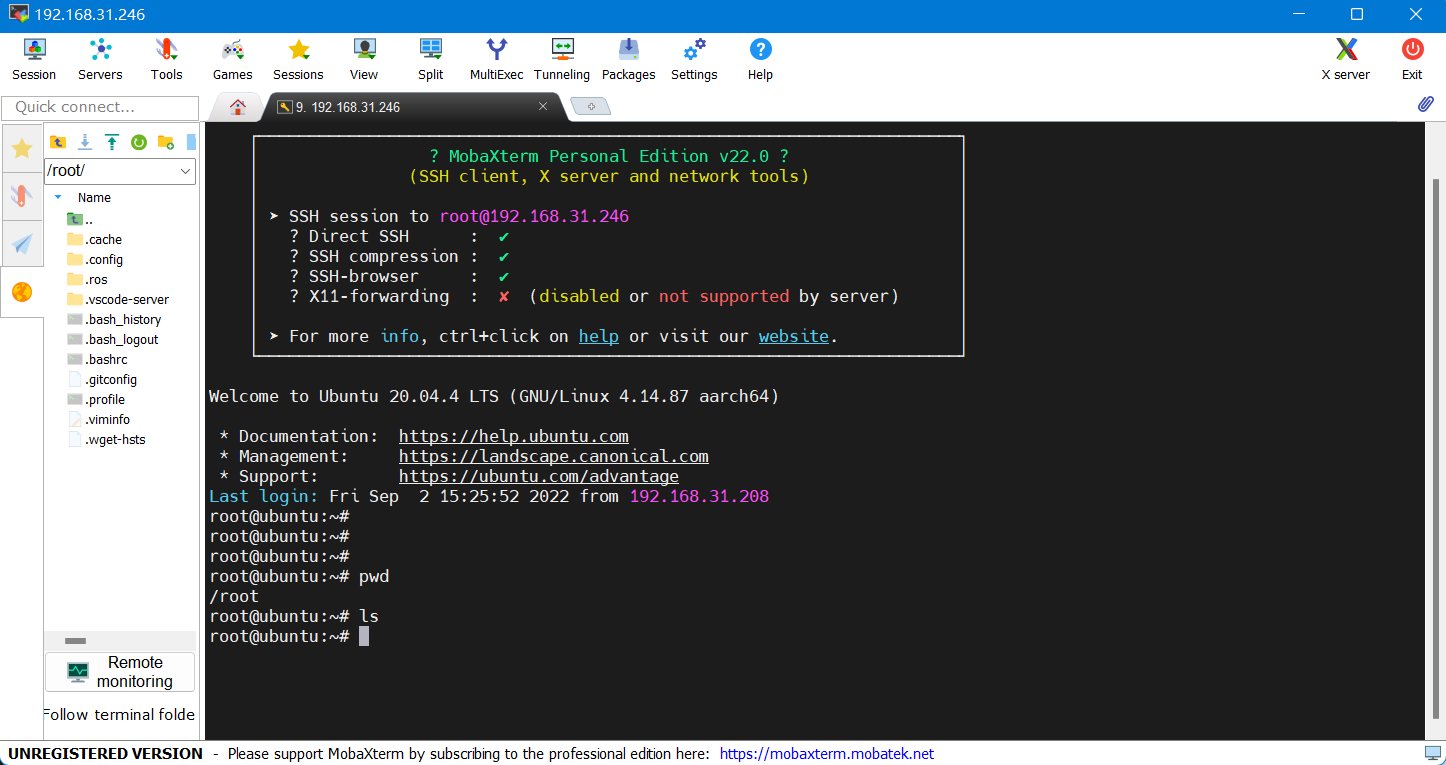
Enter the username and password: root/root, and you can log in successfully:
Info
-
If you are in the Ubuntu environment on the PC side, you can also use the following command to implement ssh remote login in the terminal (note to change the IP address to the actual address): ssh root@192.168.31.246
-
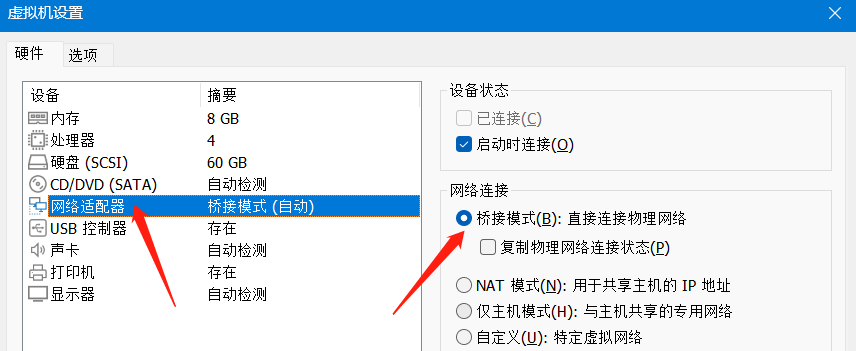
If you're using a virtual machine, set the network to bridging mode
Native Ubuntu system configuration
Install Ubuntu
Refer to the official manual of RDK X3(Sunrise X3 Pi) to complete the installation of the Ubuntu system, and it is recommended to use the server version.
After completing the Ubuntu installation, start the system and follow the following link to complete the configuration of the wireless network:
$ sudo nmcli device wifi rescan        # Scan wifi networks
$ sudo nmcli device wifi list          # List the Wi-Fi networks found
$ sudo wifi_connect "SSID" "PASSWD"    # Connect to a specified wifi network
After the network connection is successful, run the following command to update the system software to the latest version:
Install TogetheROS/ROS2
After restarting the Ubuntu system, run the following command to install TogetheROS, the Horizon Robotics development platform:
Configure the ROS2 software source and key:
$ sudo apt update && sudo apt install curl gnupg lsb-release #Update software source
$ sudo curl -sSL https://raw.githubusercontent.com/ros/rosdistro/master/ros.key  -o /usr/share/keyrings/ros-archive-keyring.gpg #Set the ROS2 software source key
$ echo "deb [arch=$(dpkg --print-architecture) signed-by=/usr/share/keyrings/ros-archive-keyring.gpg] http://packages.ros.org/ros2/ubuntu $(source /etc/os-release && echo $UBUNTU_CODENAME) main" | sudo tee /etc/apt/sources.list.d/ros2.list > /dev/null #Set the ROS2 software source
Attention
Most domestic developers will encounter the same problem here: the URL cannot be connected. The solution can refer to this post on the official website of Guyueju: "Solving the "Failed to connect to raw.githubusercontent.com" error"
Install the ROS2 core feature pack:
$ sudo apt update #Update software source
$ sudo apt install ros-foxy-ros-base ros-foxy-demo-nodes-cpp  # Install the ROS2 feature pack
It will take a bit longer and will require a little waiting.
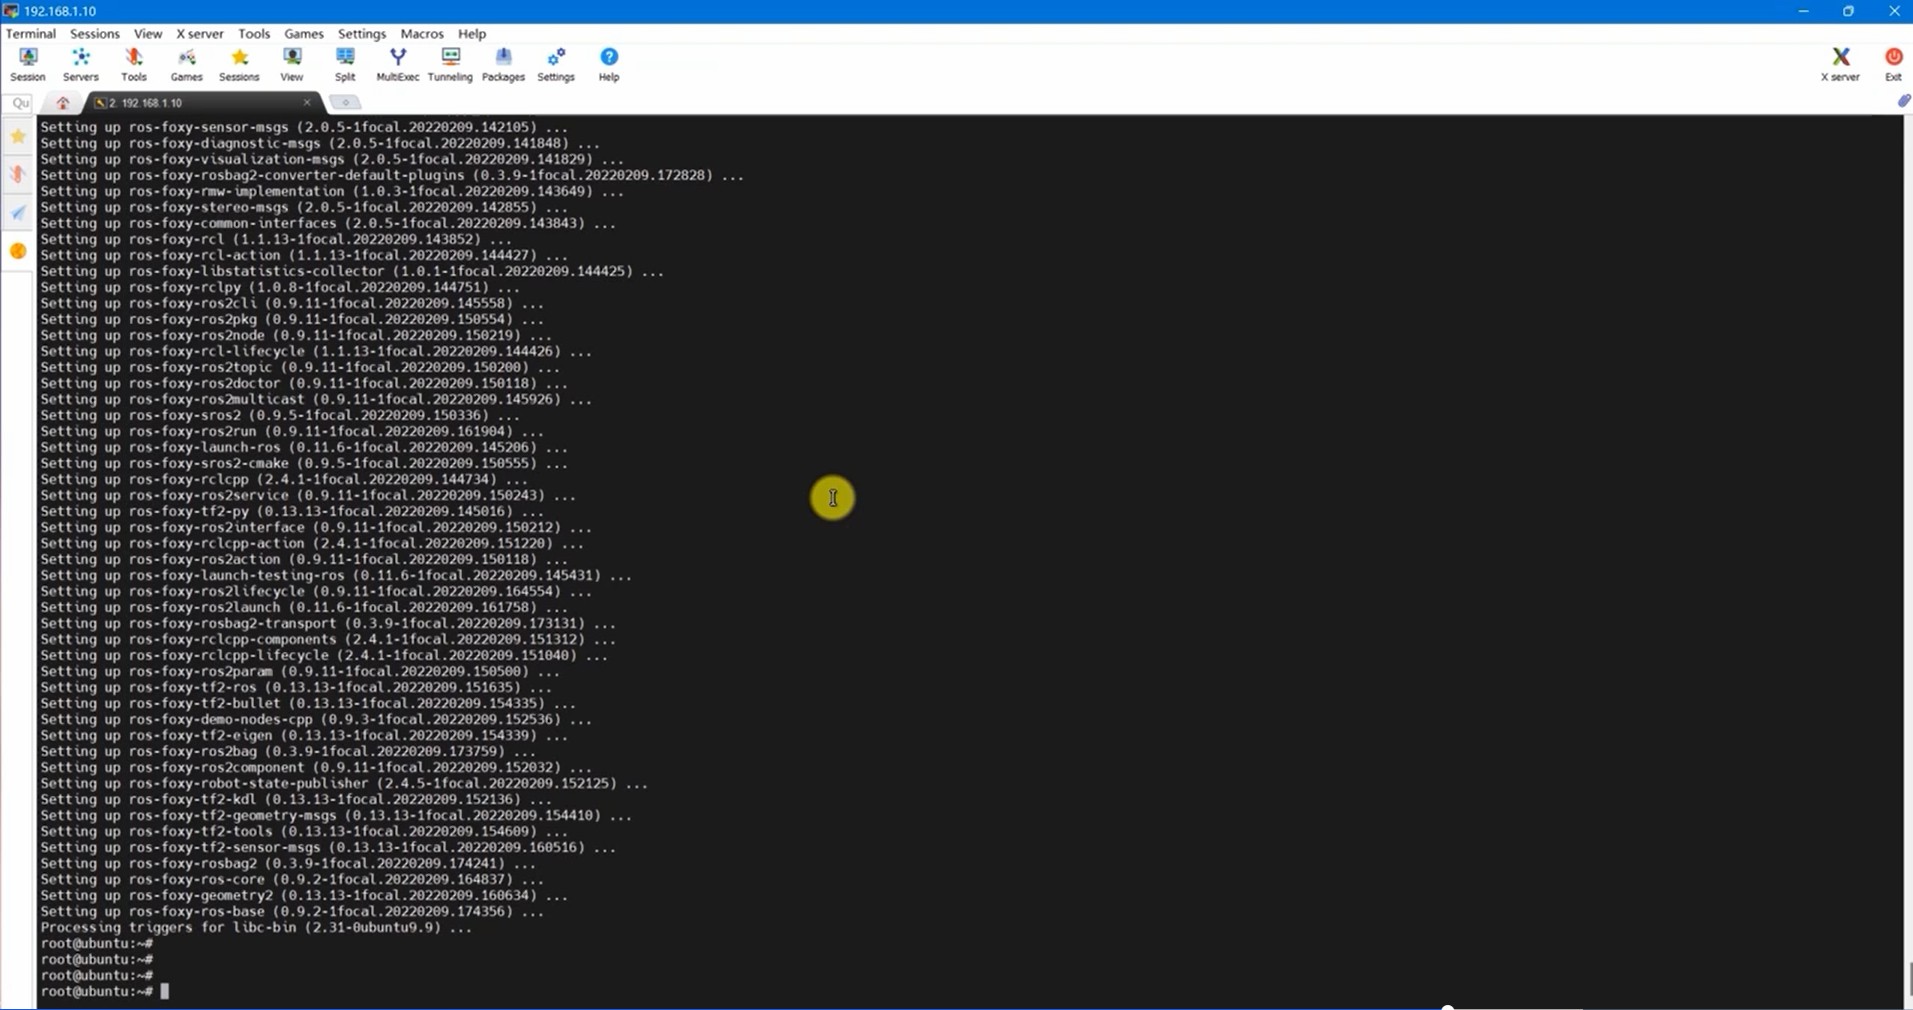
Now ROS2 is installed.
You can use the same command to continue installing more feature packs in ROS2.
Attention
If the ROS installation and download fails, run the following command to complete the pull of the application code of the OriginBot bot, and install the ROS and dependent libraries in order.
Install feature packs and dependencies
In order to meet the needs of subsequent robot development, a series of function packages and dependency libraries need to be installed:
$ sudo apt install python3-colcon-common-extensions     # The ROS2 compiler
$ sudo apt install git                                  # Install git tool
$ sudo apt install ros-foxy-slam-toolbox                # Install slam-toolbox
$ sudo apt install ros-foxy-cartographer-ros            # Install cartographer
$ sudo apt install ros-foxy-teleop-twist-keyboard       # Install a keyboard controller node
$ sudo apt install ros-foxy-robot-localization          # Install the positioning package
$ sudo apt install cloud-utils                          # Disk installation tool
$ sudo apt install ros-foxy-rmw-cyclonedds-cpp          # Install Cyclone DDS
$ sudo apt install ros-foxy-teleop-twist-joy            # Install the drive pack for the handle
$ sudo apt install ros-foxy-joy-linux                   # Install the drive pack for the handle
$ sudo apt install ros-foxy-cv-bridge                   # Install the image processing package
$ sudo apt install ros-foxy-xacro                       # Install the model parsing package
$ sudo apt install ros-foxy-robot-state-publisher       # Install the robot status Publisher package
$ sudo apt install ros-foxy-joint-state-publisher       # Install the joint status publisher package
$ sudo apt install ros-foxy-joint-state-publisher-gui   # Install the joint status publisher package
$ sudo apt install ros-foxy-image-transport             # Install the image compression package
$ sudo apt install ros-foxy-image-transport-plugins     # Install the image compression package
$ pip install opencv-contrib-python -i https://pypi.tuna.tsinghua.edu.cn/simple  #Installs the specified opencv version
$ sudo apt-get install libboost-python1.71.0            #Install Boost dependencies
Install the sensor drive
If you are using OriginBot with LiDAR, you need to refer to the following instructions to complete the installation of the lidar SDK driver package:
# Installation tool library
$ sudo apt install cmake pkg-config
$ sudo apt-get install python swig
$ sudo apt-get install python-pip

# Build the ydlidar SDK
$ cd /userdata
$ git clone https://github.com/YDLIDAR/YDLidar-SDK.git
$ cd YDLidar-SDK
$ mkdir build
$ cd build
$ cmake ..
$ make -j2
$ sudo make install

# Install the SDK for python
$ cd ..
$ pip install .
Compile the application code
In the userdata (or root) folder, create a dev_ws/src workspace
Next, go to this path and download the application code of the OriginBot bot:
Go back to the workspace path and start compiling the code:
Configure the lidar port number
In the function package of the lidar, a script for binding serial port numbers is provided, which can be executed according to the following instructions:
$ chmod 0777 /userdata/dev_ws/src/originbot/originbot_driver/ydlidar_ros2_driver/startup/*
$ sudo sh /userdata/dev_ws/src/originbot/originbot_driver/ydlidar_ros2_driver/startup/initenv.sh
Set environment variables
Add environment variables to bashrc:
$ vi /root/.bashrc

# Add the following at the end of the file:
source /opt/tros/setup.bash
source /userdata/dev_ws/install/local_setup.bash
Attention
The bashrc script configured here is related to the logged-in user, if you use the "sunrise" user to log in, you should modify the .bashrc file in /home/sunrise.
Back up the OriginBot SD card image
The following backup process is done on the Ubuntu system on the computer.
Compress disk space
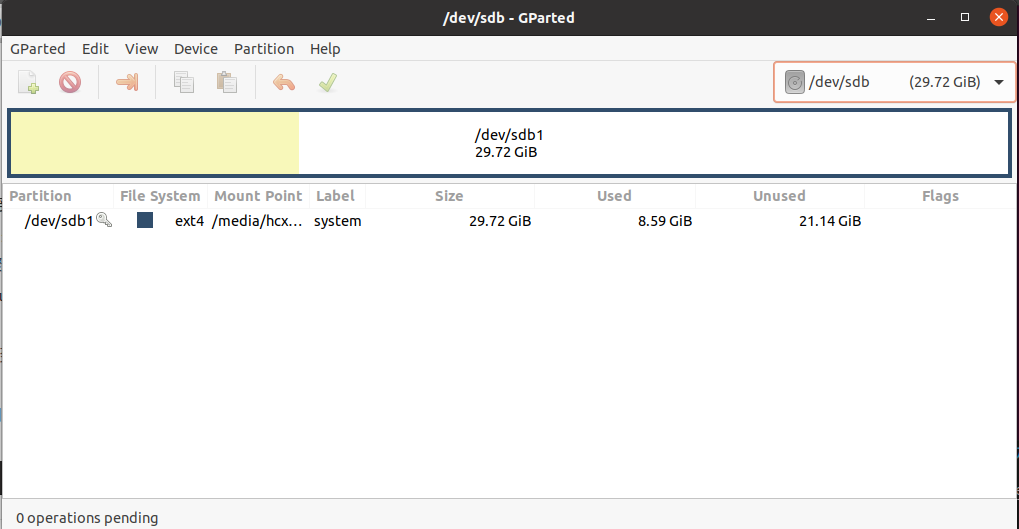
In order to reduce the image size, we first use gparted software to compress the disk space of the SD card. Insert the SD card into the running computer, install and launch the gparted software:
In the open gparted software, select the SD card in the upper right corner:
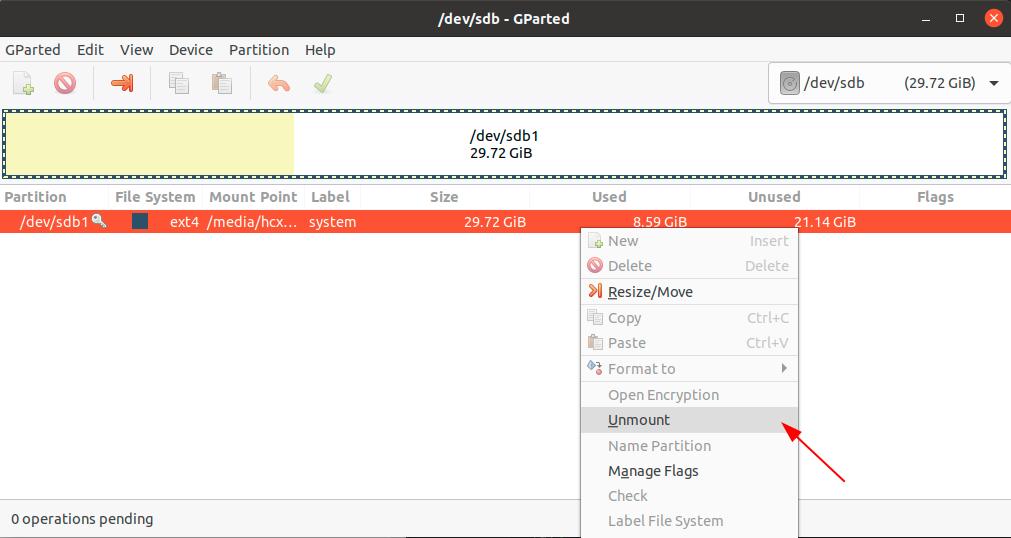
Then right-click and select Mount Unmount SD Card:
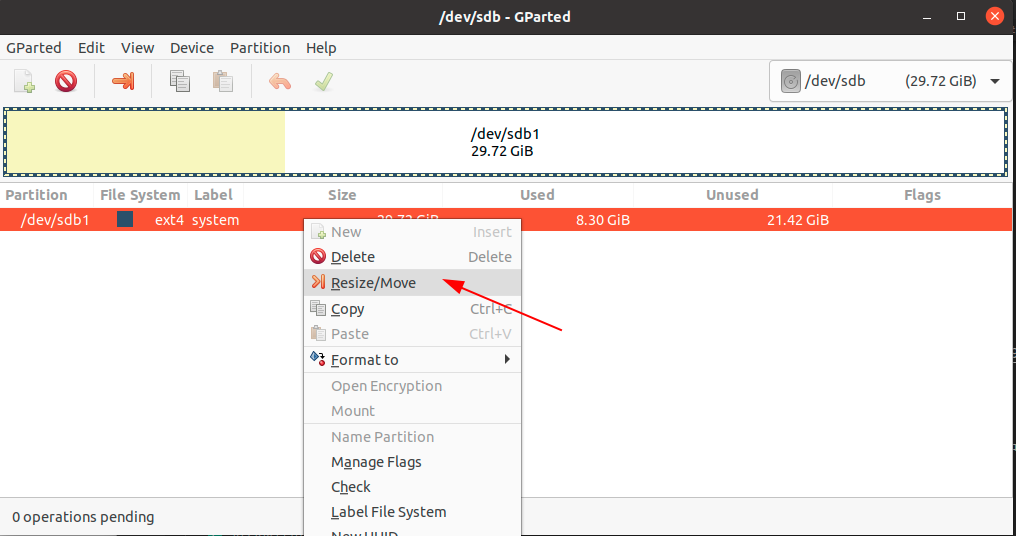
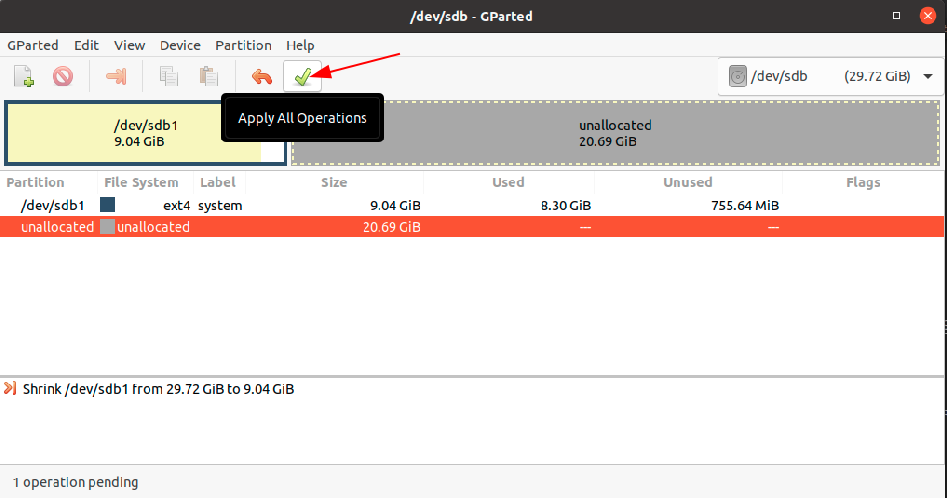
Go ahead and right-click, select the "Resize/Moves" option to reset the space on your SD card:
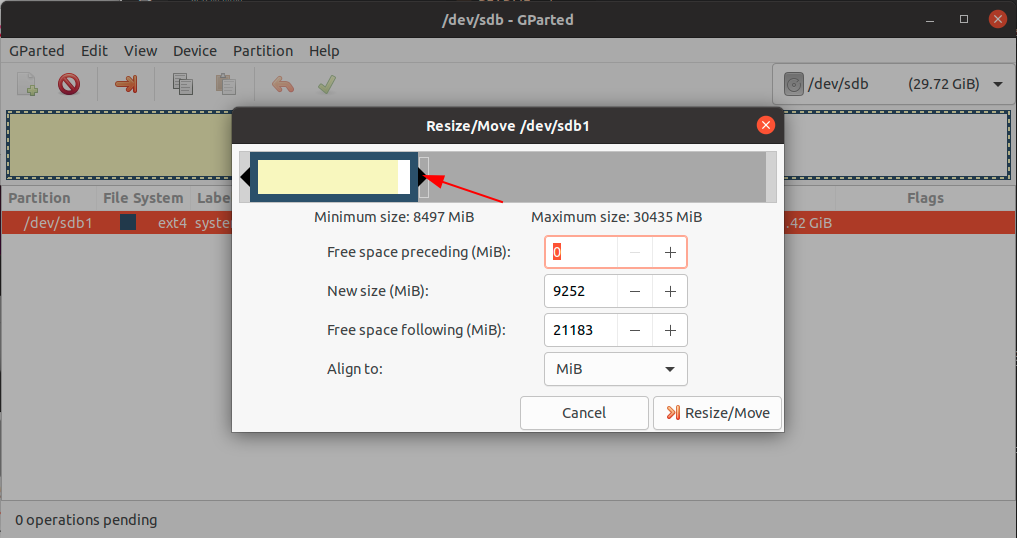
Drag the right side of the space partition bar, compress the space, where yellow is the occupied partition, white is the free partition, pay attention to keep a little white free partition to avoid the image cannot be started.
After confirmation, click the execute button in the software to start the compression operation.
Once the compression is complete, you can close the gparted software.
View disk information
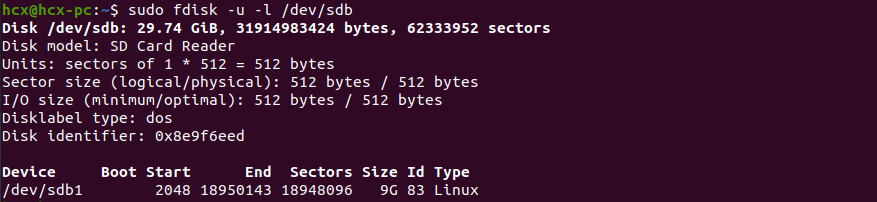
Open the terminal and run the fdisk command to view the current disk status.
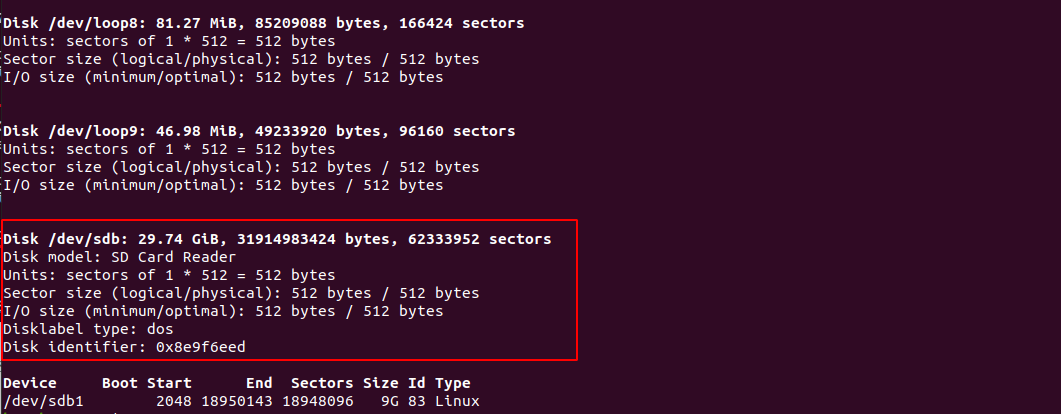
In the figure, /dev/sdb is the disk number of the SD card, run the following command to view the partition information of the SD card:
Start the backup-to-disk
Now you can use the dd command to back up your SD card to an img file.
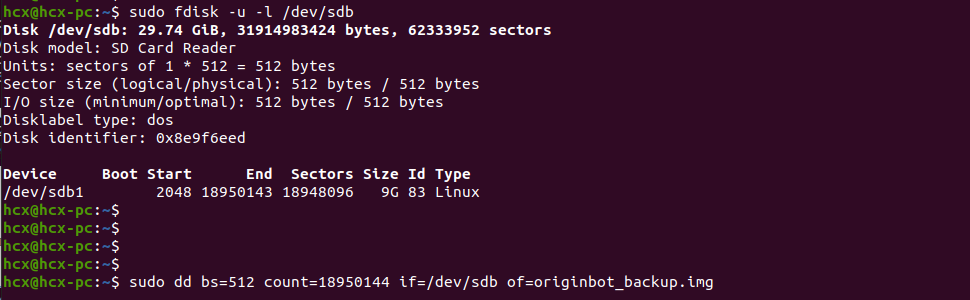
At this time, there is no message in the terminal, but the backup has started and it will take a long time, so please wait patiently.
After the backup is completed, the terminal command will automatically pop up, and the img image backup file will be obtained in the current path.

The generated IMG image file is large, and if necessary, you can continue to use zip and other tools for compression and decompression.
At this point, the SD card image has been backed up, and when you need to use it, you can refer to Burn the OriginBot SD card image.
